
Key takeaways
Use a static code only when the address is final; choose a dynamic code on a domain you own when the print may outlive its destination. Verify a short HTTPS address before generating, keep error correction at M unless print conditions call for more, and export an SVG master. Size the whole symbol including a four-module quiet zone, and approve the printed proof, not the screen preview. Print a typeable URL and a plain description beside the code, and limit who can change where it points.
Your poster is ready for the printer, the packaging artwork is almost approved, and someone asks for a QR code in the corner. Turning the link into an image takes little effort. Making sure customers can still use it after the campaign changes takes more thought.
To turn a link into a QR code properly, treat the printed symbol as a long-lived asset. Choose an address you can maintain, leave enough room for reliable scanning, and give people another way to reach the content. The download button isn't the finish line.
Choose a Static or Dynamic Code#
Will the destination ever change after the code is printed or shared? That's the question that decides which type to use.
A static QR code contains the destination URL directly. It doesn't need a QR management service to decode, although the website and its domain still need to work. If you need to encode a different address, you'll need a new image and a reprint.
A dynamic QR code contains a stable URL that redirects elsewhere. Changing the routing or destination leaves that public URL unchanged, so the printed image can keep working.
Static and dynamic QR codes compared
| Criterion | Static QR code | Dynamic QR code |
|---|---|---|
| Where the destination lives | Encoded inside the image | In a redirect you control |
| Change the destination after printing | Needs a reprint | Edit the redirect, same image |
| Works without a service | Yes | No, the redirect must stay live |
| Scan tracking | Not built in | Counted server-side |
| Best for | Permanent destinations | Campaigns and assets that outlive a URL |
Match the choice to the asset#
A product manual at a permanent address suits a static code. So does a menu page if you'll update its contents without changing its address. Changing the page isn't the same as changing its URL.
Packaging that may remain in circulation after a promotion ends is a stronger case for dynamic routing. You can change the destination after printing and replace an expired offer with relevant product information rather than leave customers at a dead end.
If you'll replace the printed material whenever the destination changes anyway, maintaining a redirect may add little value. The static versus dynamic QR code comparison helps separate that operational decision from generator features.
Dynamic routing carries an ongoing obligation: keep the domain, HTTPS configuration, and redirect service live for as long as people might encounter the print.
How long the redirect behind a dynamic code takes#
A dynamic code adds one redirect between the scan and the page it promises, so that hop is part of what the person holding the phone waits for. In RedirHub’s redirect speed benchmark[1] for 5 to 12 November 2026, the median time to first byte of a redirect, averaged over Washington, D.C., Frankfurt and Tokyo, was 17 ms for RedirHub, 37 ms for Dub, 57 ms for Short.io, 85 ms for TinyURL, 118 ms for Bitly and 268 ms for Rebrandly, out of 27 providers measured. The redirect happens before the landing page starts loading, which is one more reason to test the finished code on mobile data rather than office Wi-Fi.
Create a QR Code From Your Link in Five Steps#
A long, untested campaign URL is a poor starting point. It can produce an unnecessarily dense pattern while preserving mistakes such as staging addresses, expired tracking parameters, or a destination that requires a staff login.
Use a generator that exposes standard settings. DENSO WAVE's QR standards guidance[2] describes the symbol versions, capacity, and error-correction options behind those controls.
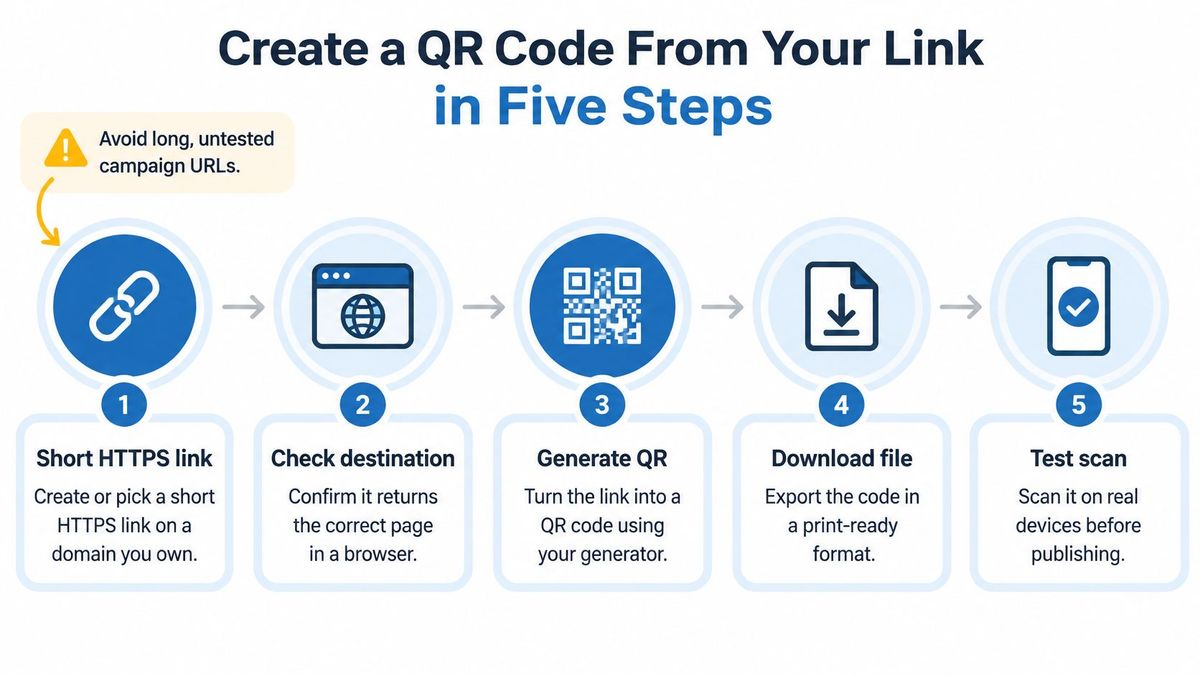
- Choose a short HTTPS address and verify it. For a managed code, create the redirect on a domain you own before generating the image. Open it in a private browser window, then use the browser's Network panel to check its response and final destination, not just whether it works while you're logged in.
- Paste the exact URL into the generator. Remove accidental spaces and unnecessary tracking strings, but don't alter meaningful capitalization or path characters. Put campaign parameters on the redirect destination when practical, rather than crowding them into the printed payload.
- Keep Model 2 and automatic encoding. Let the generator select the smallest version that fits the address at your chosen correction level. Don't force a smaller symbol version or decorative pattern just to make the preview look simpler.
- Start with error correction M. That's a practical professional-print baseline; use the print conditions below to decide whether greater damage tolerance is justified. Don't automatically select the strongest setting without checking what it does to density.
- Export an SVG master and a PNG for the intended output. Preserve the untouched vector file, then check both exports before placing either in artwork. Don't substitute a screenshot or enlarge a small raster image in the layout application.
Make the instruction match the destination#
Tell the customer what the scan accomplishes. Blind Barrels, for example, sends its code to a dedicated QR code page[3] on its own site rather than to the homepage, a useful connection between a physical item and the next digital action. Your own wording should be equally specific about the menu, instructions, registration, or other content.
You now have a verified address and master artwork ready for sizing and physical testing, not yet an approved print asset.
Size and Error Correction for Print#
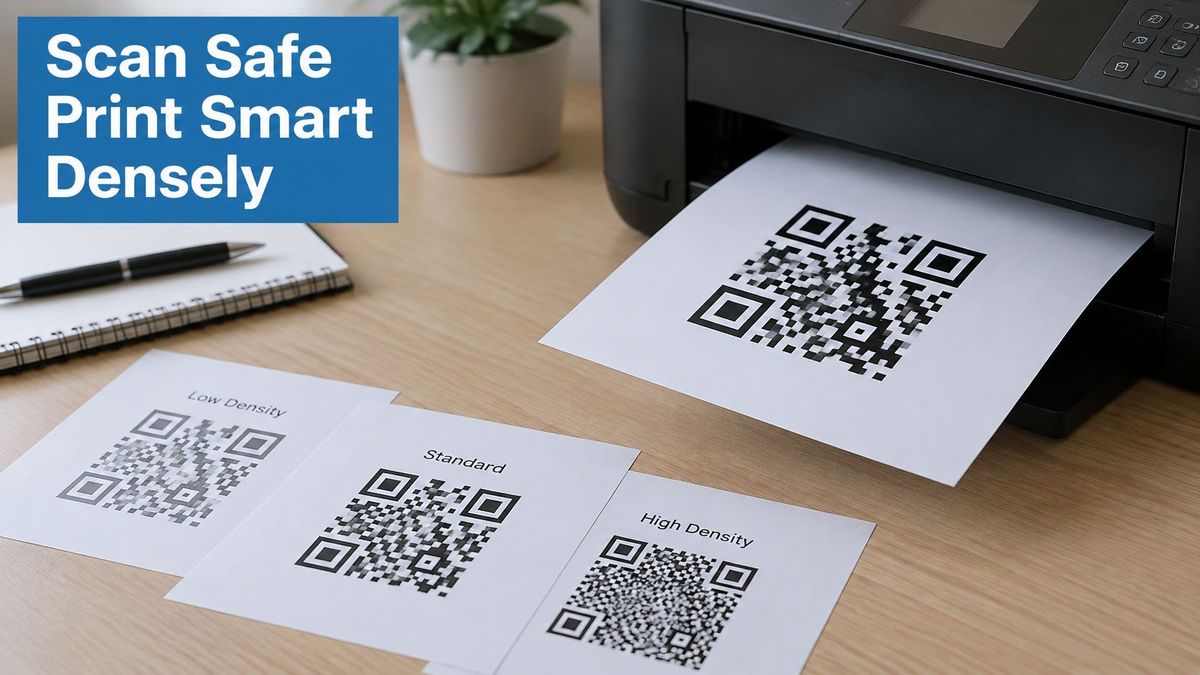
A small code on a label may scan on screen but fail at its actual printed size. Error correction affects how much damage a QR code can tolerate, and higher levels create a denser pattern. If you choose a stronger level, allow room for the larger symbol it may require.
The percentages below are approximate codeword recovery rates. They do not mean that the same share of the visible code can be covered. Damage location matters.
Error correction levels and where to use them
| Level | Codewords restored | Best use |
|---|---|---|
| L | About 7% | Clean digital screens and short-range use |
| M | About 15% | Standard professional print baseline |
| Q | About 25% | Abrasion, curved packaging or low-contrast reproduction |
| H | About 30% | Brand mark in the code or heavy wear, with the largest symbol |
Use the levels as a starting point, then check how the finished artwork scans. Stronger error correction cannot compensate for a crowded layout or a blocked quiet zone.
Size the complete symbol#
Leave a clear quiet zone around the code. A common QR code specification uses a margin four modules wide on each side. For example, a 29-module Version 3 symbol with 0.254 mm modules has a pattern 7.366 mm wide. Including the quiet zone brings the overall width to about 9.398 mm.
That is a geometry example, not a recommended size for every printed piece. Set the dimensions for the viewing distance and printing conditions. Keep the margin free of text, tint, trimming and nearby graphics.
For glass, vinyl decals such as Custom Sticker Shop’s 4-inch rounded QR code window decal[4] are one format to consider. Glass reflections, background activity and installation position can affect scanning, so account for the application when setting the code size.
For practical print preparation, review the QR code print guidance and confirm the dimensions and clear margin on the printer's proof.
Test the Printed Code Before Release#
A code that decodes on a bright monitor can fail on coated stock, a curved label, or a window. Approve the actual printed proof, not the generator preview.
Build the acceptance checks before anyone signs off the artwork. The following is a practical test protocol, including suggested app coverage and viewing angles, rather than a guarantee of performance.
Pre-release test matrix for a printed QR code
| Test | What to check | Pass when |
|---|---|---|
| Screen decode | Vector and raster files in three scanner apps | Decodes on the first attempt |
| Printed proof at size | Scan the proof from the planned distance | Scans from the planned distance |
| Lighting and angle | Scan in shade, under glare and at about 30 degrees | Still decodes |
| Cellular redirect | Scan with Wi-Fi off and check the landing page | Page loads with the expected title |
| Device spread | Test on an iOS and an Android camera app | Both open the same destination |
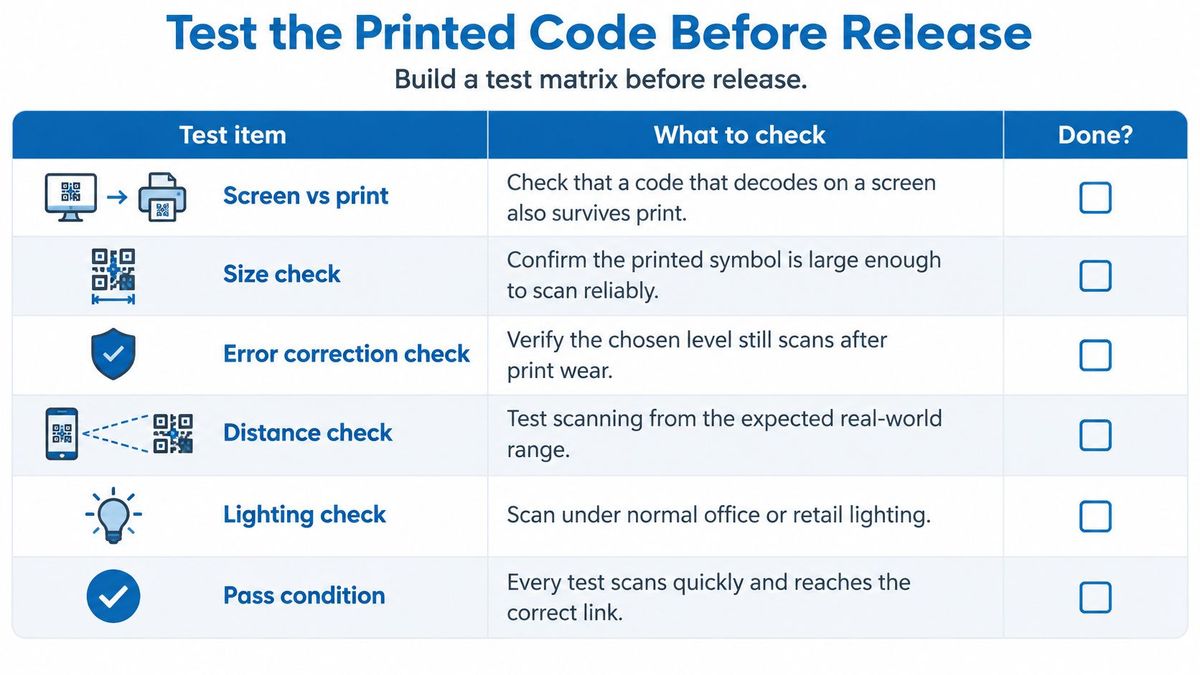
Test the installation, not just the sheet#
Hold or mount the proof where customers will encounter it. Start at the planned scanning distance rather than moving the phone close enough to make it work. Try ordinary retail or office lighting as well as shade, glare, and an oblique angle.
Use both iOS and Android camera apps, plus another scanner app for the exported-file check. Turn Wi-Fi off for the destination test so an internal network, cached login, or staff-only resource doesn't conceal a public-access problem.
Diagnose the right failure#
If the camera won't recognize the symbol, inspect the printed modules and margins. Ink spread can close gaps, weak reproduction can erase detail, and resizing can soften edges. Correct size, contrast, or production quality before regenerating everything.
If the camera recognizes the URL but the page fails, investigate the redirect and website. A broken mobile layout, authentication prompt, or failed HTTPS connection isn't a QR image problem.
Record failures and retest the corrected artwork. A successful scan of the previous version doesn't approve a replacement export.
Make the Code Usable for Everyone#
A QR code isn't automatically frictionless. An image-only instruction excludes people who can't aim a camera, have low vision, use assistive technology, or don't have a compatible phone.
U.S. Section 508 guidance on QR accessibility[5] recommends meaningful alt text, an adjacent text alternative or link, strong contrast, and testing with assistive tools. The code should be an option, not the only entrance.
Place these beside it:
- A short, typeable URL. Print the actual address clearly enough to read without photographing it. Keep it outside the quiet zone.
- A plain-language destination description. Use wording such as “Read the product manual” or “View the lunch menu,” rather than an unexplained “Scan me.”
- Another usable route. In digital content, provide a normal clickable link. Where appropriate, offer an established SMS route, NFC option, or staff assistance.
Check what happens after access#
For a QR image in a document or webpage, write alt text that communicates its purpose. An adjacent descriptive link should let someone reach the same content without operating a scanner.
The landing page also needs attention. Check keyboard navigation, visible focus, screen-reader labels, zoom, and mobile browser behavior. Don't make the fallback address lead to a page that's harder to use than the code itself.
Test the printed asset at its actual size and placement. A readable sign on a designer's desk may be difficult to reach, see, or scan when installed behind a counter.
Keep the Destination Safe After You Print#
A QR code on a poster may remain in circulation long after a campaign ends. If someone compromises its redirect, every copy can lead to an unintended destination.
A QR code security checklist can help assign responsibility for publishing and account access. Treat destination control as part of the code's ongoing maintenance.
Protect the address and its editing rights#
- Use a recognizable domain with HTTPS. Print the address beside the code so people can compare it with their phone's preview. HTTPS protects the connection, but does not prove a page is legitimate.
- Give the page a clear identity. Its title and heading should identify the organization and content before it asks for credentials or payment details.
- Approve the source address before printing. Choose the slug carefully. A link's source URL cannot be edited after creation, so correcting it means generating replacement artwork.
- Limit destination editing rights. Give access only to people who need it, and keep a change history. In RedirHub, Viewers can only look while Editors create and edit links and QR codes, and on Pro every link shows its change history: who changed it, when, and the old and new values.
- Plan campaign retirement. Replace an expired offer with a relevant live page that explains what is available now, rather than sending visitors to an unrelated homepage.
Review unexpected traffic spikes alongside destination edits. A spike may be legitimate, but an unfamiliar edit needs investigation. Check public signage for replacement stickers, too.
Dynamic routing lets you update a destination without reprinting the code. It also means whoever controls the redirect controls where every distributed copy leads.
Confirm the Code and Ship It#
Choose static for a final address, or dynamic on your own domain when the printed asset may outlive its destination. Then make approval a documented production decision rather than a casual scan at someone's desk.
Before release, confirm the essentials:
- Destination approved. The public link opens the intended page without staff credentials.
- Print approved. The proof scans at the planned distance, and the quiet zone remains clear after layout and trimming.
- Access approved. The fallback is readable, and the landing page works with keyboard navigation and zoom.
- Independent check complete. Someone other than the creator has scanned the printed proof and confirmed the content.
Leave a record for the next person#
Log the code's owner, source address, redirect target, creation date, and review or expiry date. Keep the approved artwork and proof reference with that record so a colleague can identify exactly what went to print.
For multiple campaigns, use one inventory rather than separate spreadsheets for each team. Every physical code should trace back to a responsible person and a current destination. When a page moves or a campaign closes, that record tells the owner what needs attention.
Today's action is straightforward: create the code, verify the printed proof, and record the owner and destination before approving production.
RedirHub’s dynamic QR codes are included on Core, Pro and Enterprise. Their destination can change after printing, and they download as PNG (512, 1024 or 2048 px) or SVG, so you can keep the vector master this guide recommends.
Print a code you can still update
Create a dynamic QR code on your own domain, download it as SVG for print, and change the page it opens without reprinting.
Create a dynamic QR codeSources
Frequently asked questions
Check that the link is a short, public HTTPS address that opens the right page, then paste it exactly into a QR code generator. Keep the standard settings, start with error correction M, and export an SVG master plus a PNG for the intended use. Test the printed proof before release.
A static code encodes the address itself, so it suits a destination that will never change. A dynamic code encodes a stable URL that redirects, so you can change the destination after printing, as long as the domain and redirect stay live.
Level M, which restores about 15% of codewords, is a practical baseline for professional print. Q or H suit codes that may get dirty, worn or carry a logo, but they make the pattern denser, so allow for a larger symbol.
Leave a quiet zone four modules wide on every side, free of text, tint and trimming. A 29-module Version 3 code with 0.254 mm modules is about 7.4 mm wide, or about 9.4 mm with its quiet zone; set the real size for the scanning distance and print conditions.
Print a short, typeable URL and a plain description of what the code opens beside it, and keep strong contrast. In digital content, add alt text that describes the code's purpose and a normal clickable link to the same page.

Leo Astarothman is the Brand & Content Lead at RedirHub, where he shapes the company's visual identity, educational content, product experiences, and marketing strategies. He also specializes in system design. Simplifying complex redirect infrastructure into practical resources, product experiences, and campaigns that help businesses understand and adopt modern redirect management.
Related Articles
View All Articles