


Direct Answer
To redirect a domain whose DNS is at DigitalOcean, create the redirect in RedirHub, then at DigitalOcean point the root domain to RedirHub with an A record, add the TXT verification record, and point www with a CNAME. RedirHub detects the change and issues the SSL certificate automatically.
DigitalOcean DNS hosts your records but has no redirect feature; otherwise you would need a Droplet or App Platform app running a web server with a certificate. RedirHub serves the redirect for you, with automatic HTTPS.
Before you start#
- The DNS for your domain is managed at DigitalOcean. If your domain uses another provider's nameservers, make the changes there instead (how to check).
- A RedirHub account. The 14-day free trial is enough for this guide.
- About 10 minutes, plus time for DNS to update.
Step 1: Create the redirect in RedirHub#
In the RedirHub dashboard, open Redirects, click New redirect and choose Single import. Enter your domain, for example example.com, and click Next. Then set the destination URL, the Method (301 for a permanent move) and the Forwarded Options, and create the redirect.
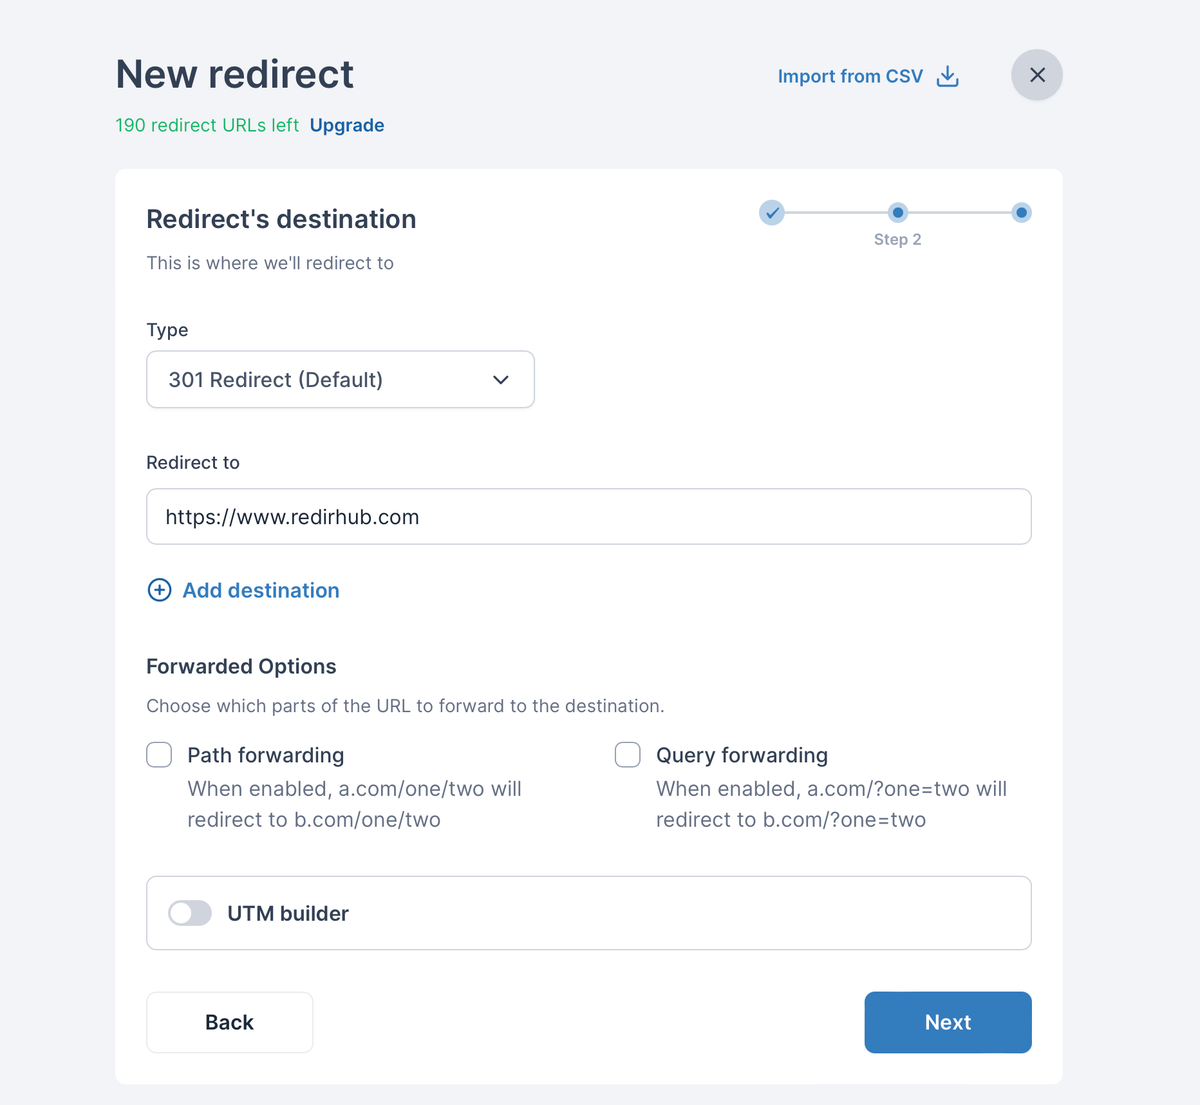
The root domain covers www
You don't need to add www separately. A redirect for the root domain also covers www, including the same paths, as long as www points to RedirHub in DNS.
Need more detail on these options? See Setting Up URL Redirects and Redirect Methods Explained.
Step 2: Open Connect DNS in RedirHub#
Click Connect DNS in the notice that appears after you create the redirect, or open Hostnames and click Connect DNS next to the domain. DigitalOcean doesn't support automatic setup yet, so RedirHub opens the Manual tab. It lists each record with a copy button, plus any old record you need to delete.
| Host | Type | Value |
|---|---|---|
| @ (root domain) | A | 3.33.236.10 |
| @ (root domain) | TXT | Your verification value, e.g. rehd-verify=abc123.rediredge.com |
| www | CNAME | Your CNAME target, e.g. abc123.rediredge.com |
Step 3: Update the DNS records at DigitalOcean#
- Log in to DigitalOcean, open Networking → Domains and click your domain.
- Delete existing A, AAAA and CNAME records for @ and www. Keep NS, MX and other TXT records.
- Create an A record: hostname @, will direct to 3.33.236.10.
- Create a TXT record: hostname @, value from your dashboard.
- Create a CNAME record: hostname www, is an alias of the value from your dashboard.
Only change A, AAAA and CNAME records for the root and www: your email (MX) and other TXT records keep working as before.
Step 4: Wait for Connected and HTTPS#
RedirHub checks the records automatically. Changes are often picked up within minutes but can take up to 24 hours, depending on the TTL of the old records. When the domain shows Connected, the redirect is live, and the SSL certificate status changes to Secured shortly after.
Step 5: Test the redirect#
Open your domain in a private browser window and check the homepage, a deeper page and the www version, over both http:// and https://. If something doesn't work yet, see Troubleshooting new redirects or how long DNS changes take.
Frequently asked questions
No. Your domain and DNS stay at DigitalOcean. You only change the records for the root domain and www.
Yes. You only replace A, AAAA and CNAME records for the root domain and www. MX records and other TXT records, such as SPF, stay as they are.
No. The root domain redirect also covers www, as long as www points to RedirHub with the CNAME record. Add www separately only if it should go somewhere else.
Usually minutes, sometimes up to 24 hours while the old DNS records expire. RedirHub detects the change automatically and then issues the SSL certificate.