
Connect DNS points a domain or subdomain to RedirHub so its links start working. It shows which DNS record is missing and gives you two ways to add it: Automatic, where your DNS provider adds the records after you approve them once, and Manual, where you copy the records yourself. Connect DNS is available on every plan.
Step 1: Open Connect DNS#
Go to Hostnames in the dashboard. Every hostname that doesn’t point to RedirHub yet shows a DNS issue badge and a Connect DNS button. Click it.
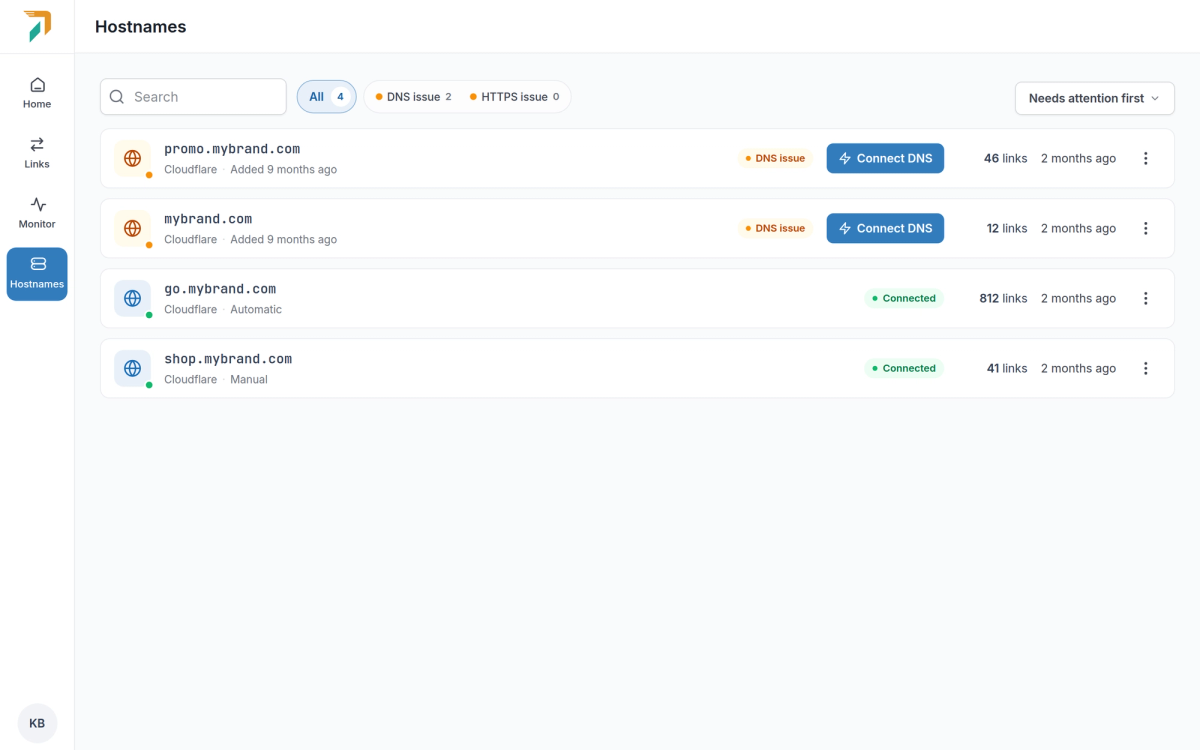
Hostnames that don’t point to RedirHub yet have a Connect DNS button.
The window shows your DNS provider, what is missing (for example CNAME missing) and how many links are waiting. The recommended tab is Automatic when your provider supports it, otherwise Manual. Nameservers is a separate add-on and isn’t covered here.
Step 2a: Automatic setup with Cloudflare#
Automatic setup uses Domain Connect and today works with Cloudflare. RedirHub shows the exact records, you approve them once at Cloudflare and come straight back. There are no API keys and RedirHub gets no lasting access to your account.
Subdomain#
For a subdomain such as promo.mybrand.com, Cloudflare adds one CNAME record, set to DNS only. Click Continue with Cloudflare, approve the record and you return to the dashboard.
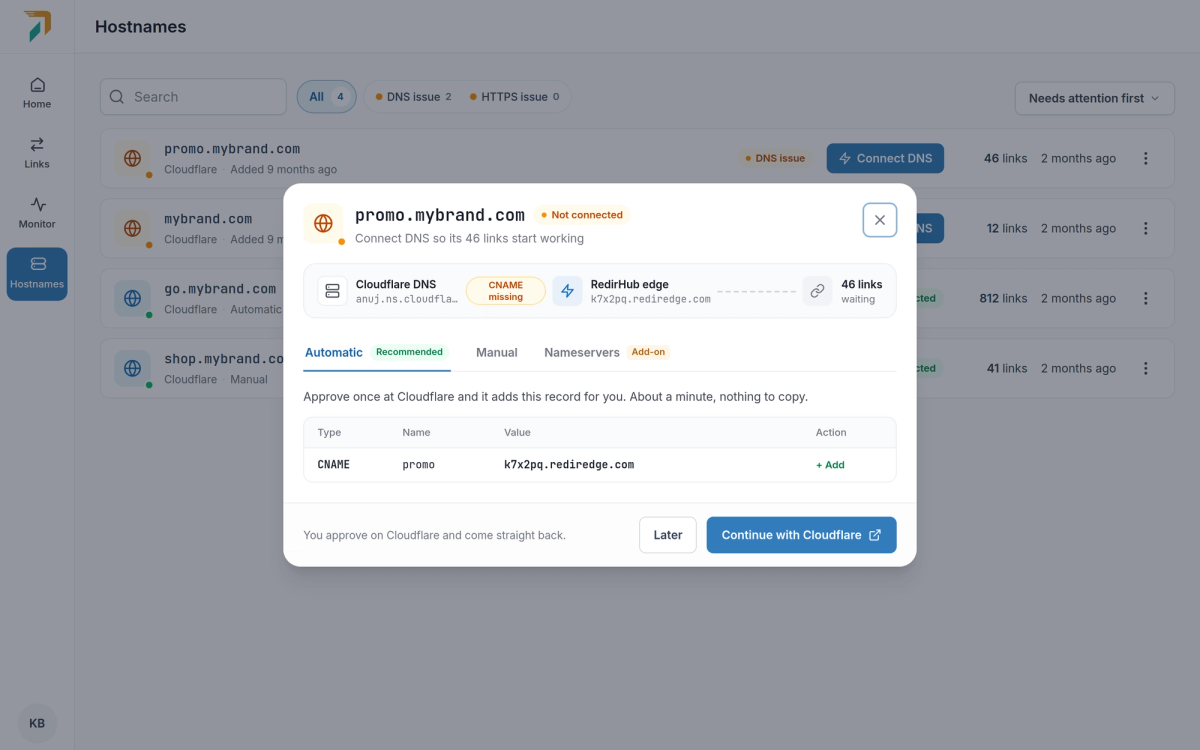
Automatic setup for a subdomain adds one CNAME record.
Root domain and www#
For a root domain such as mybrand.com, the section Cloudflare will make these changes lists every change: the A record on @ is replaced, a TXT record (rehd-verify=…) is added for verification, and a CNAME is added for www. Also connect www is ticked by default. Email (MX) and every other record stay as they are.
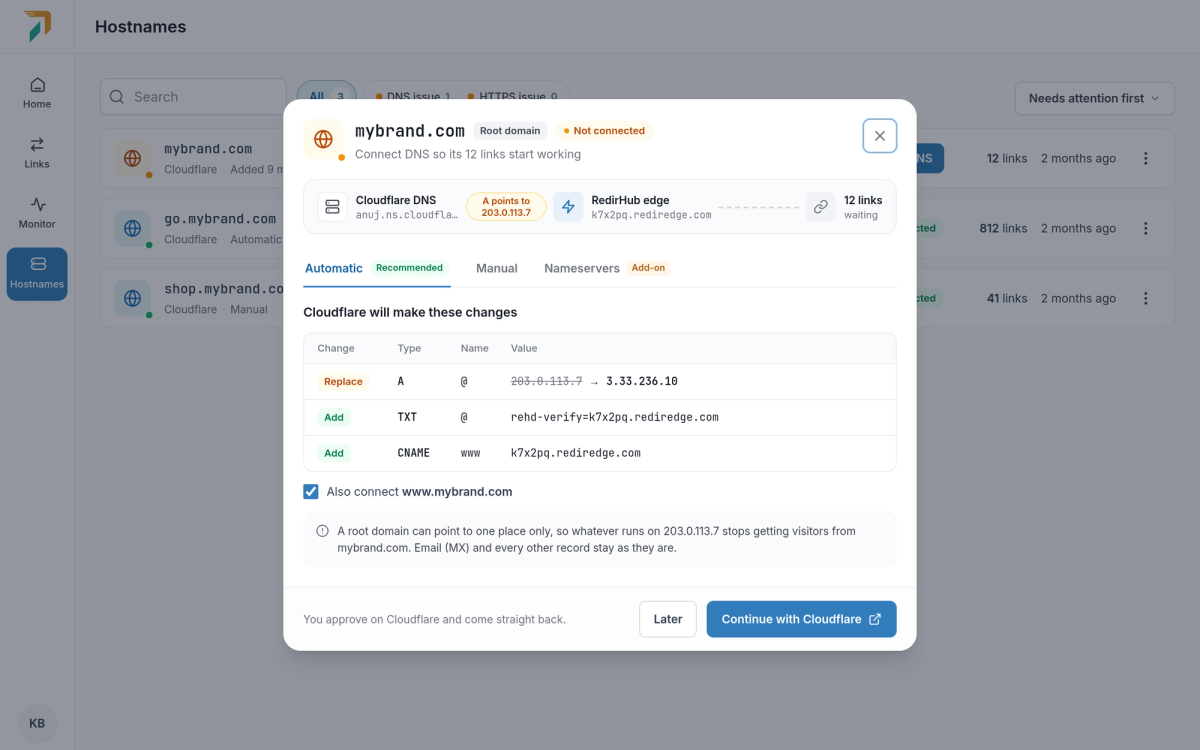
For a root domain, the A record is replaced and TXT and www records are added.
A root domain points to one place
Once the A record is replaced, whatever ran on the old IP address stops getting visitors from the root domain.
Step 2b: Manual setup with any provider#
Use Manual when your provider doesn’t support automatic setup yet, or when you prefer to add records yourself. If Automatic is unavailable, the tab is disabled and Manual says why.
- Click the button that opens your provider’s DNS page, such as Open GoDaddy DNS.
- Add the record shown. Use the copy button for the value. CNAME is the default; if your provider refuses it, switch Record type to A record.
- Click I’ve added the record.
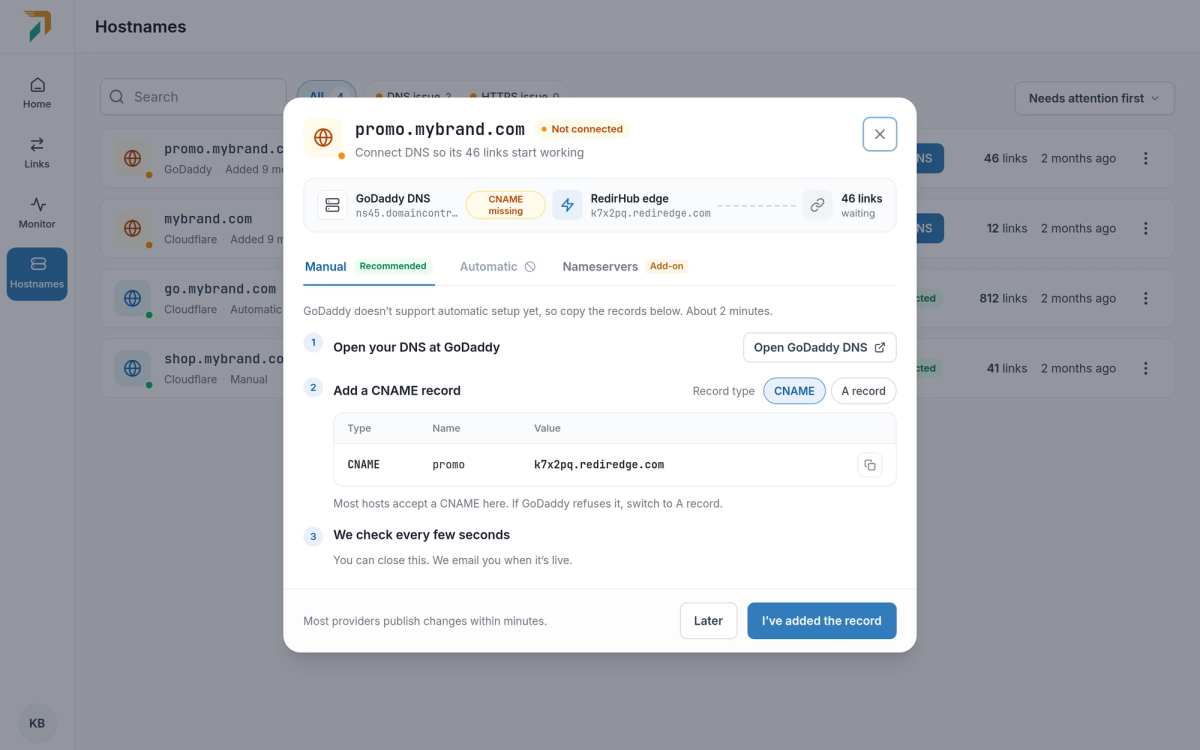
Manual setup: copy the record into your DNS provider.
| Hostname | CNAME | A record |
|---|---|---|
| Subdomain | One CNAME | A + TXT |
| Root domain | CNAME on @ (flattened) + TXT | A on @ + TXT |
Manual also links to a step-by-step guide for Cloudflare, Amazon Route 53, GoDaddy, Namecheap, Google Cloud DNS and Azure DNS.
Step 3: Wait for DNS and HTTPS#
The window checks every few seconds and shows each step: the record added, DNS points to RedirHub, then the HTTPS certificate, which is issued automatically once DNS is in place. Click Check now to check right away, or close the window: RedirHub keeps checking and emails you when the domain is live.
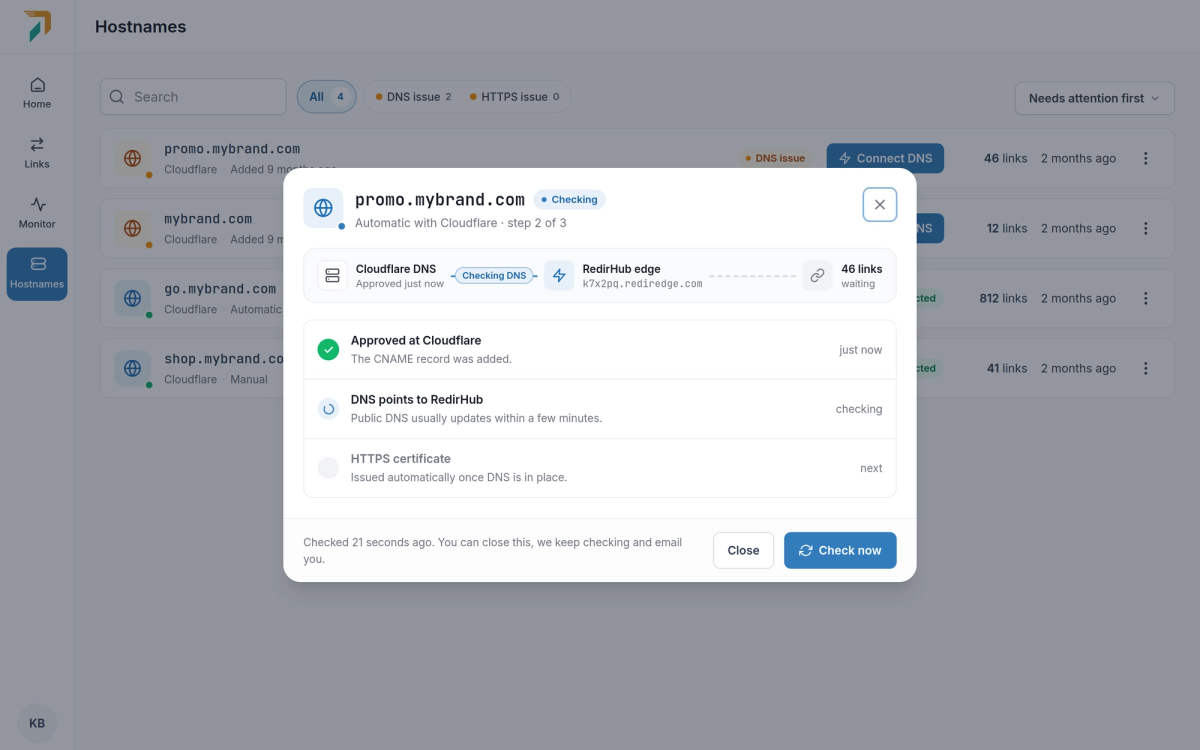
After approval, RedirHub checks DNS and then issues HTTPS.
Want to know what each record does? See What DNS changes are needed for a domain redirect? For timing, see How long does the DNS change take?
Good to know#
- Automatic setup works with Cloudflare today. Other providers use Manual.
- Automatic is also unavailable when your workspace’s edge network isn’t set up for it, or when the hostname is a wildcard.
- A root domain with an old rehd-verify= TXT record left on it can stay on verifying until you remove the old record.
Frequently asked questions
No. You approve the records once at Cloudflare. There are no API keys and no lasting access to your account.
No. For a root domain only the A record on @ is replaced, and a TXT record and a www CNAME are added. MX and every other record stay as they are.
Your DNS provider doesn’t support automatic setup yet, your workspace’s edge network isn’t set up for it, or the hostname is a wildcard. Use the Manual tab instead.
Check its DNS for an old TXT record that starts with rehd-verify= and remove it. Verification then continues.